

Creating an online course is time consuming. You want to make sure everything is ready to go before you publish it. The good news is that you can save yourself a significant amount of time simply by having the right framework for creating an online course.
In this post, we’ll show you how you can organize and speed up your online course creation process – in five easy steps. We’ll also take a look at some tools to help you get started.
Let’s begin!
How to Speed Up Online Course Creation (In 5 Easy Steps)
Having a clear framework in mind on how to structure and create your online course allows you to get started with a step in the right direction.
#1: Create a Course Outline
The first thing you need to do is create an outline for your course. Outlines serve a number of purposes:
● Guides the course creation process.
● Gives you a high-level view of what the course will cover.
● Can be used as a checklist to keep track of which lectures you’ve created and which ones are left.
● Makes it easy to add or remove lectures from your online course or restructure it before creating content.
Your outline should highlight your course’s structure, sections, and (ideally) sub-sections. Taking some time to plan your course will be well worth your time and save you from having to go back and make major changes later on.
Think of your course outline as a curriculum of sorts. For example, you might consider splitting your lectures up into a few different sections and list the lectures’ proposed titles under each section. It might look something like this:
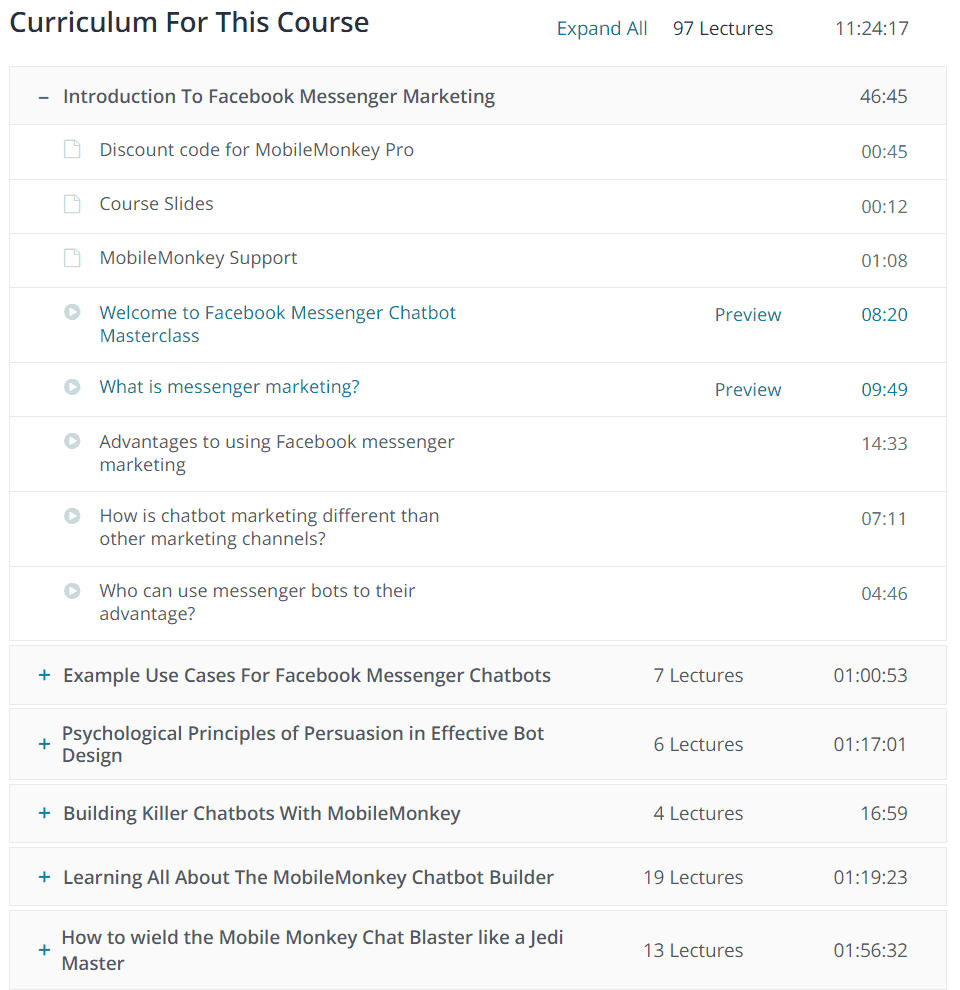
Notice how the course instructor has grouped lectures into different sections e.g. Introduction To Facebook Messenger Marketing and Example Use Cases For Facebook Messenger Chatbots.
#2: Use Templates
As an online course creator, you’ll find yourself creating similar types of content from scratch over and over again. Instead of recreating the wheel every single time, take some time to put together templates that you can reuse.
If you’ve ever created an online course before, you probably already know which tasks are repetitive. For instance, you might find yourself creating similar styled lecture notes, course outlines, visuals, and graphics over and over again.
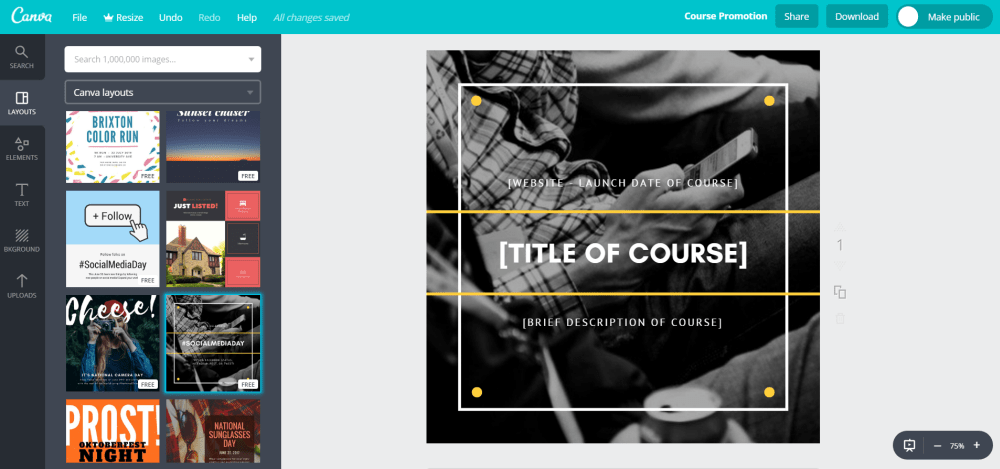
Let’s take the course outline as an example. Instead of creating an outline from scratch every time, you might consider putting together an outline template. It might look something like this:
[Course Title] Description: [Brief description of what we’ll cover in the course.] Course Section #1: [Title] ● Lecture #1: [Title] ● Lecture #2: [Title] ● Lecture #X: [Title] Course Section #2: [Title] ● Lecture #1: [Title] ● Lecture #2: [Title] ● Lecture #X: [Title]
This way, you can simply copy-paste your outline template in a new file and fill out the course title, description, section titles, and lecture titles instead of spending time formatting. One huge benefit of using templates is that you’ll be able to achieve consistency in your work.
And if you like to create similar-looking, branded visuals to promote your online course on social media, you might create a template for each image using Photoshop or Canva. By doing so, you’d only have to add your course’s title and description to the graphic instead of designing it from scratch.
#3: Organize Your Content Library
Having all your course content files scattered all over the desktop will save you five seconds of folder management that you will (most certainly) pay back many times over in your workflow. Instead, create folders and sub-folders to better organize your course content on your drive.
To kick things up a notch, you might consider developing a file naming convention for your course outlines, images, and video content. This will help you keep everything neat and organized and save you a lot of trouble in case you have to go back and make edits.
For example, you might settle on a file naming scheme like [YYYY-MM-Title-Version] for course outlines and lectures.
What’s more is that having a consistent naming scheme for your files and media makes it easy to search and gives you important information at a glance.
Maintaining an organized content library will save you a huge chunk of time down the road when you have a few online courses, dozens of lectures, and hundreds of image files to keep track of. Instead of trying to remember or figure out where you saved the final course lecture, you’ll be able to find it easily every time.
#4: Work in Batches
Are you planning on producing your online course video lectures, creating a social media graphic, and editing your course’s video for publishing every time you publish a new lecture on your website? If that is the case then you might want to reconsider your workflow.
Sure, variety is the spice of life and switching between different tasks may keep things from getting too mundane. The problem with this is that it takes time setting everything up. You’ll be much more productive if you complete tasks in batches instead of spending time switching between different tasks.
Think of it this way: when you’re editing your video lectures in post-production, you have to open up your video editing software, edit the video, add an introduction and conclusion, insert a background music clip, make color corrections, and much more. What if you spent a few hours editing all of your lecture videos on a single day instead of dividing them into different days? You would essentially be working with the same tools and doing similar work.
Just like its more efficient to target certain muscle groups when working out, dividing your tasks up into similar batches can significantly speed up your workflow.
#5: Repurpose Your Blog Posts
If you have been blogging, posting on forums, or have relevant publications then you should consider re-purposing them for your online course. This gives people access to a wide assortment of content you’ve created in one neatly packaged online course.
For example, if you’ve put together a course on digital marketing, you might consider repurposing the series of case studies you wrote earlier on how big name brands run successful digital marketing campaigns.
To take things to the next level, you can use your course material to create quizzes, assignments, checklists, lecture notes, and other value propositions to make your online courses more attractive to prospective students. Finally, you can use the same content to create email newsletters and marketing campaigns to promote your online course to your subscribers.
4 Tools to Speed Up Online Course Creation
Using the right tools for the right job will do wonders when it comes to speeding up your online course creation process.
#1: Google Docs
Google Docs is one of the best tools to create, edit, and store documents and spreadsheets. It’s on the cloud so you can access it from anywhere using any device. It makes it easy to make edits on the go, annotate documents, and share them with your team of co-authors, editors, and reviewers.
#2: Trello
Trello is a web-based project management tool that you can use to break down your content creation process and organize your workflow. You can create a separate column for each course section and add your lectures as individual cards. It also lets you create checklists to each card and add labels to get a quick, high-level view of what you’ve completed and what you need to get done.
#3: Canva
Canva is an online graphic design tool that you can use to create graphics and visuals for your online course. It comes with a number of pre-made templates for everything from social media graphics to banners. Instead of outsourcing design work, you can use Canva’s drag and drop builder and graphics library to create custom visuals for your online course.
#4: MailChimp
Once you are done putting together your course and are ready to launch, you should take a look at MailChimp. It is an email marketing platform that you can use to build email lists, create an email marketing campaign, optimize your emails for better conversion, and track progress of your marketing campaigns.
Conclusion
Planning, creating, and organizing your online course creation process with a time efficient framework in mind can help you get more done in less time.
Let’s quickly recap the main steps you need to take to speed up online course creation:
1. Start off by creating a course outline.
2. Use templates wherever possible to speed up individual tasks.
3. Settle on a folder structure and file naming convention to organize your content library.
4. Get more done by working in batches.
5. Repurpose your blog posts, case studies, and other online publications to add more value to your course.
With these techniques, you can keep your workflow smooth and stay on track. And the best part is that you’ll be able to dedicate all your efforts into the quality of your online course material.
Which techniques and tools do you use to plan, create, and organize your online course creation process? We’d love to hear from you so let us know by commenting below!
